Activity slips are used to record activities undertaken for a customer and form the basis for the invoices you send your customer.
You can invoice the full amount for the activity or invoice part of it, leaving the balance to a later date.
You can create an activity slip in three ways.
- Create a single activity slip. This allows you to enter the most detail about the activity slip
- Create multiple activity slips. You can enter multiple activity slips at once for an employee, while not entering quite as much detail for each.
-
Create a timesheet. You can enter the hours per day an employee spends to complete work for clients and customers, while automatically creating an activity slip.
You can also create a timesheet entry by assigning an hourly payroll category to an activity slip.
When you create an activity slip, you can select two cards - one for the employee or supplier who performed the activity for your company and the other for the customer for whom your company performed the activity. If you are creating an activity slip for a chargeable activity, you must enter both cards.
To create an activity slip
- Go to the Time Billing command centre and click Enter Activity Slip. The Enter Activity Slip window appears.
- In the Activity Slip tab, enter details about the activity, such as the name of the employee who performed the activity, the name of the customer for whom the activity was performed, the activity ID number and the number of units to be charged.
-
Type any adjustments in the Adjustment fields. Enter the number of units of the adjustment in the first field. You can override the amount of the adjustment that automatically appears in the adjacent field.
You can enter adjustment units or amounts as negative numbers if you want to indicate fewer hours or a lesser amount.
-
If you have billed the customer on an invoice for part of this activity, type the number of units already billed in the first Already Billed field. (You can override the amount that appears in the adjacent field.) Your entry is subtracted from the Billable units and amount. The total units and amount that have not been billed yet appear in the Left to Bill fields.
NOTE : Where Already Billed amounts are recorded If you enter units or an amount in the Already Billed fields of the Enter Activity Slip window, the amount won't appear in the Sales Journal or in the activity's history. It will only be recorded for the activity slip.
-
[Hourly activities only] If you pay the employee based on the activity performed:
- Select the Include Hours in Employee's Pay option.
- Enter an hourly wage payroll category in the Payroll Category field.
The activity hours (units) recorded for this activity are assigned to this wage category on the employee's timesheet.
NOTE : Activity hours are assigned to timesheets on the activity slip date When you record the activity slip, the activity hours are assigned to the employee's timesheet on the date entered on the activity slip. If you want to record activity hours over a number of days or pay periods, you need to record the hours in the Enter Timesheets window.
-
Click Record. The activity slip is now recorded and will appear on reports.
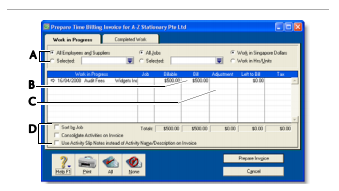
If you entered a chargeable activity on the activity slip, the activity will be available for billing in the Prepare Time Billing Invoice window.
NOTE : If you change the view, the activity slip will be recorded If you click the Multiple Activity Slips tab while creating an activity slip and you have entered the minimum required information in the Activity Slip view, the activity slip will be recorded before the new tab appears.
To create an activity slip using the timer
The Enter Activity Slip window has a timer that allows you to record the time you spend on an activity. When you have completed the activity, the information is already in the Enter Activity Slip window, eliminating extra data entry. The timer appears on activity slips for hourly activities only.
To use the timer, you must leave the Enter Activity Slip window open until the activity is completed. You can still use other programs or access other windows during this time.
- Go to the Time Billing command centre and click Enter Activity Slip. The Enter Activity Slip window appears.
- Enter the employee name, date and customer name.
- In the Activity field, type or select an hourly activity ID. The timer fields appear at the bottom of the window.
-
Click Start to start the timer. If you have not entered a start time in the Start Time field, your computer's current system time appears, and the timer starts incrementing the time in the Elapsed Time field.
NOTE : Entering a start time that is before the current system time If you enter a start time that is before the current system time, the difference will be added to the elapsed time measured by the timer. For example, if you entered 8:00 a.m. in the Start Time field and then clicked Start at 9:00 a.m., 1:00:00 will appear in the Elapsed Time field and the time calculated by the timer will be added to that amount.

Leave the Enter Activity Slip window open as you undertake the activity. This allows the timer to track the time you spend on it.
-
When you have completed the activity, or you want to pause the timer, click Stop.The current system time appears in the Stop Time field. The number of billing units corresponding to the elapsed time appears automatically in the Units field.
You can edit the start and stop times. The entries in the Actual Units and Elapsed Time fields will be updated automatically.
You can round your timer entries in the Units field automatically. See 'Setting time billing preferences'.
- If you want to resume timing the activity, click Start again. The entry in the Stop Time field will be cleared. The timer will continue incrementing, starting from your current elapsed time.
-
[Hourly activities only] If you pay the employee based on the activity performed:
- Select the Include Hours in Employee's Pay option.
- Enter an hourly wage payroll category in the Payroll Category field.
The activity hours (units) recorded for this activity are assigned to this wage category on the employee's timesheet.
NOTE : Activity hours are assigned to timesheets on the activity slip date When you record the activity slip, the activity hours are assigned to the employee's timesheet on the date entered on the activity slip. If you want to record activity hours over a number of days or pay periods, you need to record the hours in the Enter Timesheets window (see 'Timesheets' on page 110).
-
When you have completed the activity, click Record.
If you entered a chargeable activity on the activity slip, the activity becomes available for billing in the Prepare Time Billing Invoice window.
NOTE : To reset the timer Click Clear at any time to clear the Elapsed Time, Start Time, Stop Time and Units fields.
Creating multiple activity slips
In addition to being able to create single activity slips, you can also create multiple activity slips simultaneously. In the Multiple Activity Slips tab of the Enter Activity Slip window, one line in the list represents one activity slip. Although this view limits the information you can enter on the activity slip, you can view any activity slip in the Activity Slip view and enter more detail at a later stage.
NOTE : The Multiple Activity Slips view cannot be used to add activity hours to a timesheet In the Multiple Activity Slips view, you cannot choose to include an activity's hours on a timesheet.
To create multiple activity slips
- Go to the Time Billing command centre and click Enter Activity Slip. The Enter Activity Slip window appears.
- Click the Multiple Activity Slips tab.
-
In the Employee or Supplier field, type or select the name of the employee (or supplier) carrying out the activity. Any activity slips you have created for the employee or supplier are listed, with each line representing a single activity slip.

- On the first blank line, enter details of the activity slip you want to create.
-
Press TAB or click Record to record the activity slip and move the insertion point to the next line where you can begin creating a new activity slip for the employee (or supplier) you entered in the Employee (or Supplier) field.
NOTE : Activity slips are recorded as you create them on a line-per-line basis Once you have entered an activity slip and pressed TAB to move to the next line, the activity slip is recorded. If you click Cancel after moving to the next line, the previous activity slip is still recorded. A white zoom arrow (⇨) displayed next to an activity slip indicates that the activity slip has been recorded.
- Repeat from step 4 for each activity slip you want to create. When you have entered and recorded all the activity slips you want to create, click Cancel to close the window.