There are several ways to find a transaction. The method you use depends on the information you have at hand. These methods are listed in the table below.
| Use the... | To find... |
| Find Transactions window | journal entries, sales, purchases, cheques, deposits, supplier and customer payments. |
| Sales Register | transactions relating to sales (such as open and closed invoices) quotes, orders, credits and returns. This method is most efficient if you know the transaction date or the customer's name |
| Purchases Register | transactions relating to purchases (such as open and closed bills) quotes, orders, debits and returns. This method is most efficient if you know the transaction date or the supplier's name |
| Bank Register | spend money, pay bills, receive payments and receive money transactions. |
| Items Register | inventory item transactions for a particular date range. This includes inventory adjustments, auto-build and move items transactions. |
| Transaction Journal window | any transaction by source journal. |
To find a transaction using the Find Transactions window
- From any command centre, click Find Transactions. The Find Transactions window appears.
- Click the appropriate tab - for example, the Card tab to search by card.
-
Filter your search using the Search By and date range fields. For example, to search for all transactions made during January 2009 relating to the customer Island Way Motel, you would specify the following filters on the Card tab.

-
If you want to narrow your search further:
- Click Advanced. The Advanced Filters window appears.
- Type or select your additional search filters, and click OK. For more information, see 'Advanced filters'.
The transactions that match your search criteria appear in the Find Transactions window. You can view a transaction in detail by clicking the zoom arrow (⇨) next to it.
NOTE : Quotes and orders without applied payments do not appear in the Find Transactions window To find these types of transactions, go to the Quotes and Orders views of the Sales Register or Purchases Register.
To find a transaction using the Sales Register window
The Sales Register window lists all open and closed invoices, quotes, orders, returns and credits.
- Go to the Sales command centre and click Sales Register. The Sales Register window appears
-
Click the tab of the sales category you would like to view - for example, Open Invoices.

-
Filter your search using the Search By and date range fields.
The transactions that match your search criteria appear in the Sales Register window. You can view a transaction in detail by clicking the zoom arrow (⇨) next to it.
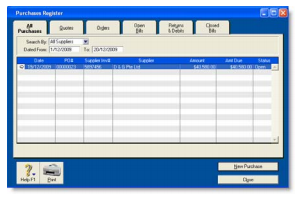
To find a transaction using the Purchases Register window
The Purchases Register window lists all open and closed purchases, quotes, orders, returns and debits.
- Go to the Purchases command centre and click Purchases Register. The Purchases Register window appears.
-
Click the tab of the type of purchase you would like to view - for example, All Purchases.
-
Filter your search using the Search By and date range fields.
The transactions that match your search criteria appear in the Purchases Register window. You can view a transaction in detail by clicking the zoom arrow (⇨) next to it.
To find a transaction using the Bank Register window
You can use the Bank Register window to find spend money, pay bills, receive payments and receive money transactions.
- Go to the Banking command centre and click Bank Register. The Bank Register window appears.
- Select the bank, credit card or petty cash account you used for the transaction in the Account field.
-
In the Dated From and To fields, enter the date range during which the transaction was recorded.
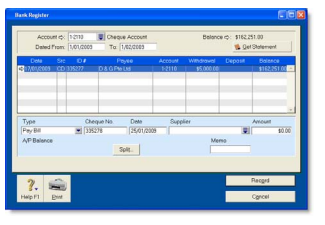
The transactions that match your search criteria appear in the Bank Register window. You can view a transaction in detail by clicking the zoom arrow (⇨) next to it.
To find a transaction using the Items Register window
When the Items Register window is filtered to show a single item, a running balance of the item's quantities and values appears.
- Go to the Inventory command centre and click Items Register. The Items Register window appears.
- In the Search By field, select whether you want to view transactions for all items or a single item.
- If you selected Item at step 2, type or select the item number in the field that appears to the right of the Search By field.
-
In the Dated From and To fields, enter the date range during which the transaction was recorded.
The transactions that match your search criteria appear in the Items Register window. You can view a transaction in detail by clicking the zoom arrow (⇨) next to it.

To find a transaction using the Transaction Journal window
The Transaction Journal window groups all your accounting entries into six journals: general, disbursements, receipts, sales, purchases and inventory. It also enables you to display all transactions.
- Click Transaction Journal in any command centre (except Card File). The Transaction Journal window appears.
- Click the appropriate tab - for example, the Sales tab to find a sales invoice, the Disbursements tab to find a cheque or supplier payment, and so on.
-
In the Dated From and To fields, enter the date range during which the transaction was recorded.
All transactions between (and including) these dates will be listed.
-
If you want to search for a range of journal ID numbers, enter the range in the ID From and To fields.
The transactions that match your search criteria appear in the Transaction Journal window. You can view a transaction in detail by clicking the zoom arrow (⇨) next to it.
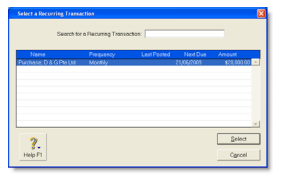
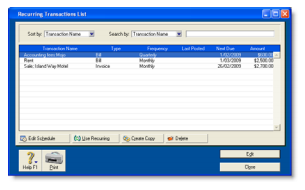
To find a recurring transaction
-
Go to the Lists menu and choose Recurring Transactions. The Recurring Transactions List window appears.
-
Locate the recurring transaction. You can:
- sort the transactions by name, type or frequency
- search for a transaction by name, amount or due date.
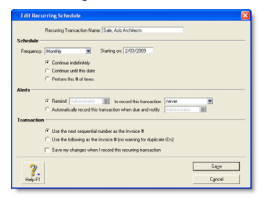
For more information on changing the details of a recurring transaction, see 'Recurring transactions'.
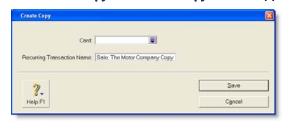
 ). The Select from List window appears listing only card types relevant to the type of recurring transaction you are copying. For example, a purchase transaction can only be applied to your supplier cards.
 ) if you want to select all the cards listed, or